
This article shows you 6 essential steps you need to complete when building a Bot from scratch.
Basic steps are presented here. There are many other tools, options, and features you need to know when building and customizing a Bot.
For more information, see:
- adding an image
- adding a gif
- adding video
- adding text formatting
- adding legal consent
- editing typing animation
Many of the tools presented in this article can be used when working with a template. For information, see Creating a Bot from a Template.
Overview
The 6 essential steps are:
- create a new Bot
- add blocks with messages
- add user interactions
- preview your Bot
- link blocks
- publish a Bot
1 Creating a new Bot
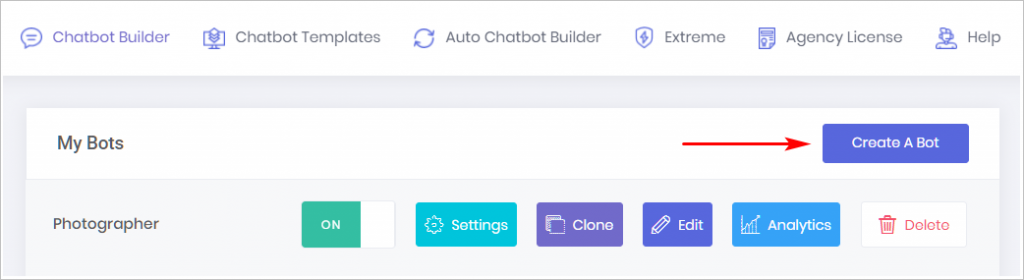
- Go to the Converto Dashboard and click My Bots. The My Bots page displays.
- Click Create a Bot.
- Type the name your Bot in the popup box. The Builder page display.
For more information about the Bot toolbar, see:
- change the Settings for an existing Bot
- clone a Bot
- edit a Bot
- review Bot Analytics
- delete a Bot
For more information creating Bots, watch the video:
- Creating a New Bot
2 Adding messages to a block
Now you have a blue workspace with no content. In this step, you add a block with message content. This is the Chatbot information your website visitors see on your website.
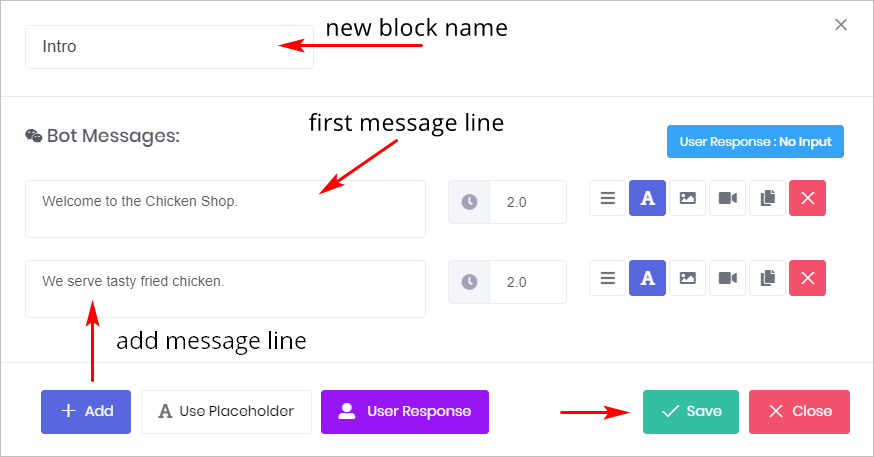
- In the top menu, click Add Block. A new block appears on the workspace.
- Click the block. The Message panel displays.
- Change the block name to Intro.
- Type the first line of your message content.
- Click the +Add button to insert a new line of message text. A blank line is added.
- Type a message in the second line.
- Repeat to add more message content.
- Click Save when finished. The Message panel closes.
For more information about adding messages, watch the video:
- Adding Message Content <<hyperlink>>
For more information about message content options, see:
- Copying Messages
- Moving Messages
- Deleting Messages
3 Adding user responses
Message content gives your website visitors information. Chatbots can do a lot more than give information.
A Chatbot can collect responses from website visitors and then provide the information they need to become a qualified lead or customer.
To collect responses from website visitors, you place a user response inside a block.
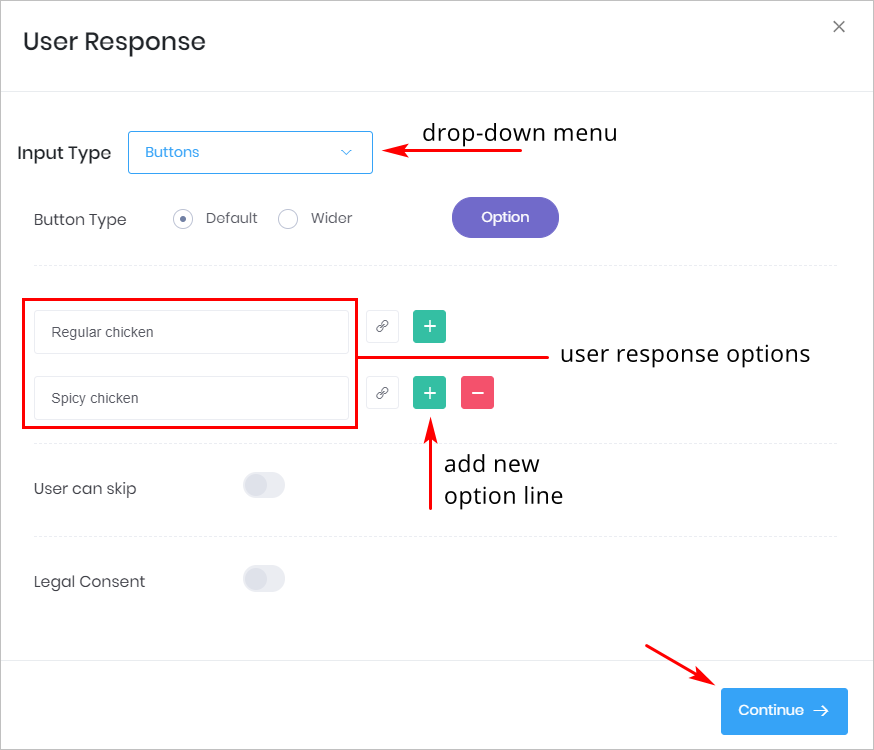
- Click the block that will hold a user response. The Message panel displays.
- Click the User Response button. The User Response panel displays.
- Next to Input Type, click the drop-down menu. A list of user options displays.
- Select Buttons.
- Type the name of the first option in the box.
- Click the green + button to add a line.
- Type the name of the next option in the box.
- Repeat as often as required. In the diagram below, we have 2 options: Regular chicken and Spicy chicken.
- Click continue. The Message panel displays.
- Click Save. The blue workspace returns.
For more information about user response options, read a series of articles in the category: Adding User Responses.
For general information about user responses, watch the video:
- Adding a User Response
4 Previewing a Bot
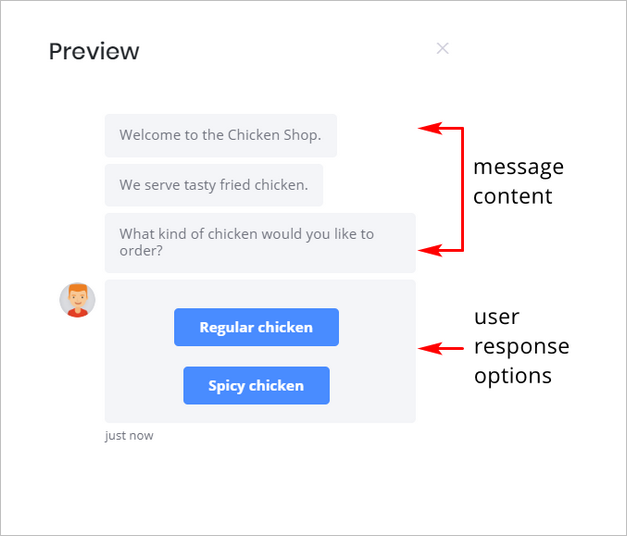
It’s good practice to preview your work as you go along.
- Go to the blue workspace.
- Scroll up to the top menu.
- Click Preview. The Preview panel appears on the right side of the screen.
5 Linking blocks
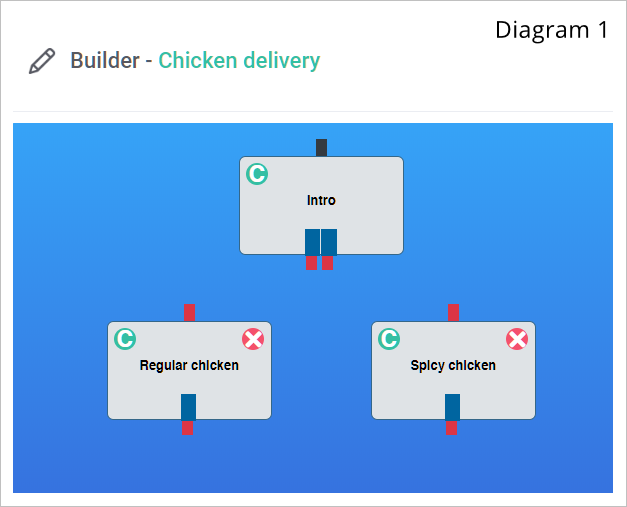
At this point, we have one block which greets a potential customer with message content and asks for a user response (i.e. select a type of chicken).
The next step is to add a new block for each response option and then link the blocks.
- Create a block for each user response option (see Step 2 above to review instructions). In Diagram 1 below, we created two blocks called Regular chicken and Spicy chicken. These blocks are not linked.
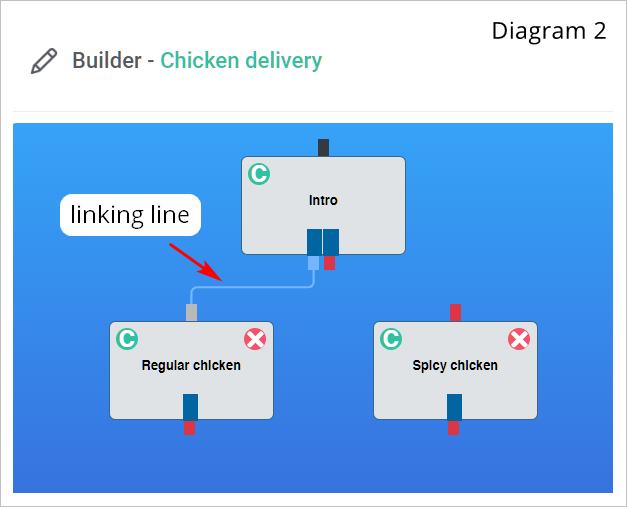
- On the Intro box, click the bottom left node and then drag it to the top node of the Regular chicken box. A linking line is created, as shown in Diagram 2.
- Repeat the process and link the Intro box to the Spicy chicken block.
For more information, watch the video:
- Linking Message Blocks <<hyperlink>>
6 Publishing a Bot
Publish your Bot after several rounds of edits and revisions. You may also want to customize its design, appearance, and behavior.
For detailed information, see: