This article shows you how to place the Booking App inside a Chatbot. With the Booking App, your users can reserve a date and time for your event or service.
Booking a time slot
There are many scenarios which might require a website visitor to book an appointment:
- set a meeting time with a service provider, salesperson, or technical expert
- make a restaurant reservation
- book a hotel room
See also
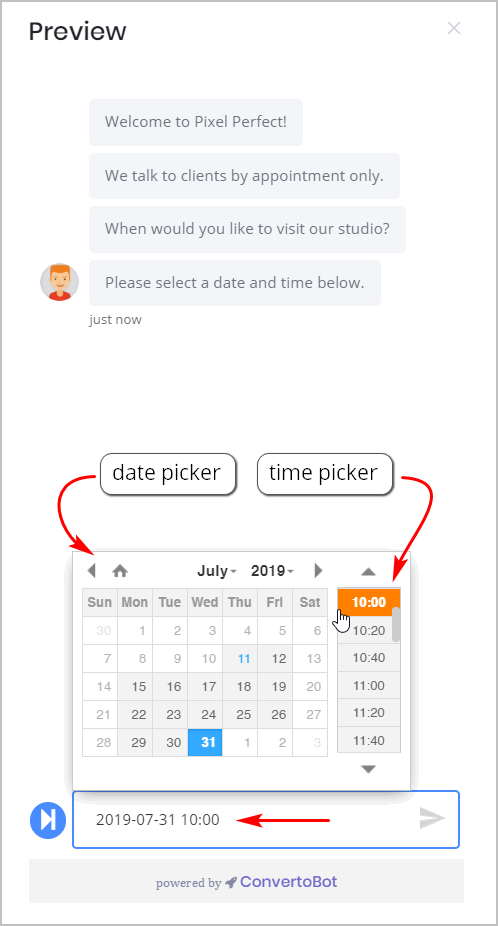
The Booking App asks users in the Chatbot to select a date and time. In some cases, you might want to ask users to choose only a date or time. In those circumstances, the Booking App might not be the right tool. Instead, consider using a different tool.
For more information, see:
1 Opening the Message block
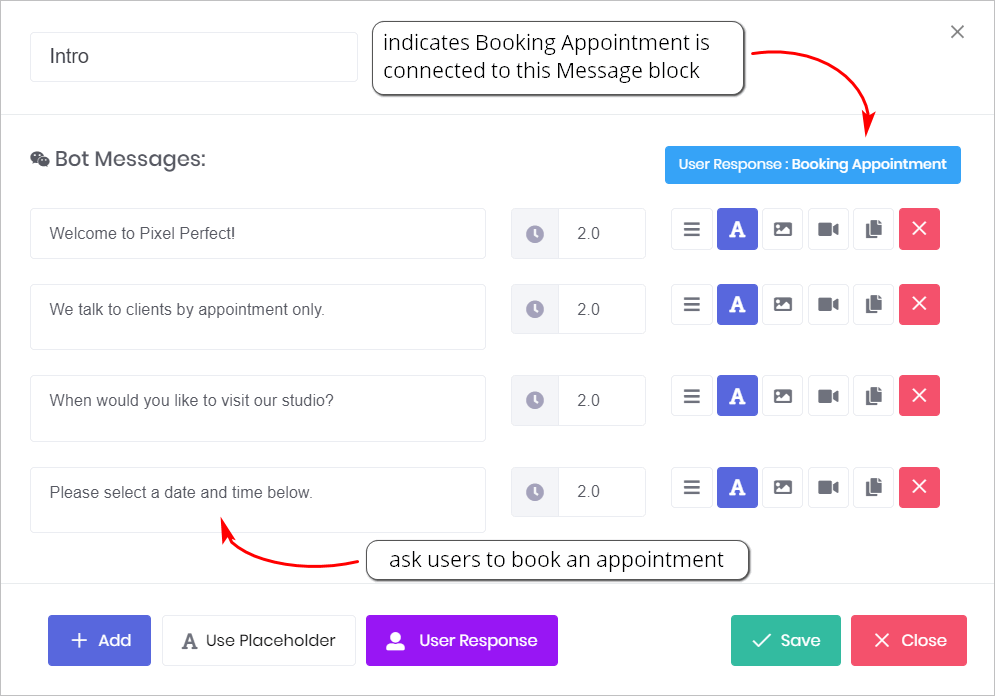
You place a Booking App request inside a Message block.
- Go to the Builder page.
- Locate the Bot you want to edit and then click Edit on the toolbar. The Builder page displays.
- Locate the Message block that will contain the user response.
- Click the Message block. The Message panel displays.
- Click Add to insert a new message line.
- Type a sentence that asks visitors to select a date and time.
2 Inserting the Booking App
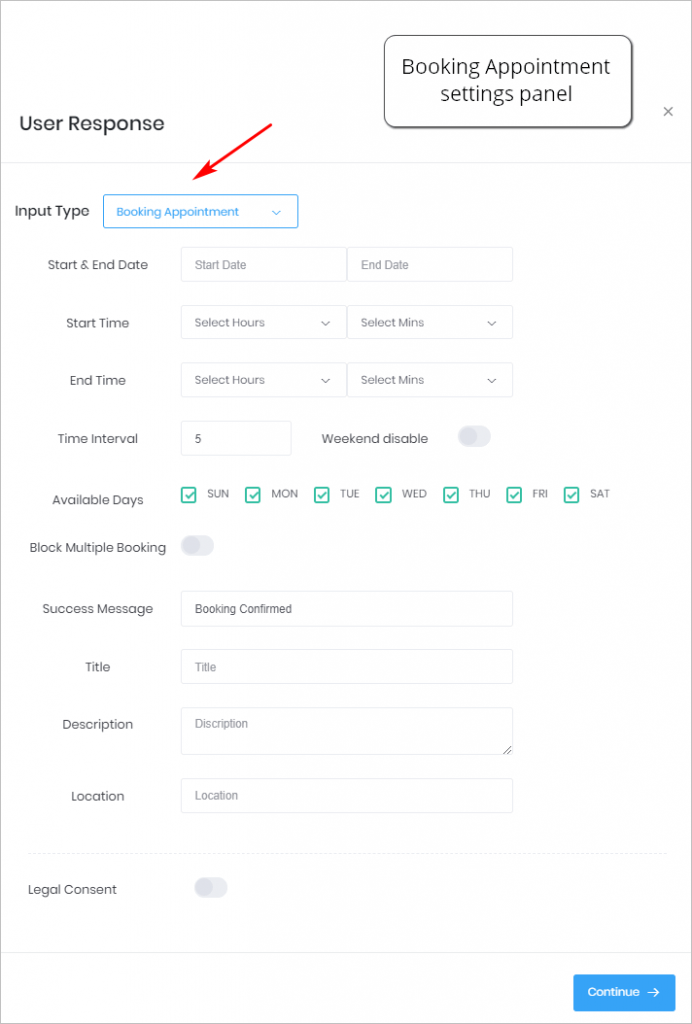
You place the Booking App tool inside a Chatbot by opening the User Response panel.
For this article, we assume a photography studio uses the Chatbot to book sales leads for studio appointments.
- Click User Response at the bottom of the Message panel. The User Response panel displays.
- Click the box beside Input Type. A drop-down menu displays.
- Select Booking Appointment.
- Configure the settings. (see below)
- Click Continue. The Message panel displays.
- Click Save.
Start & End Date
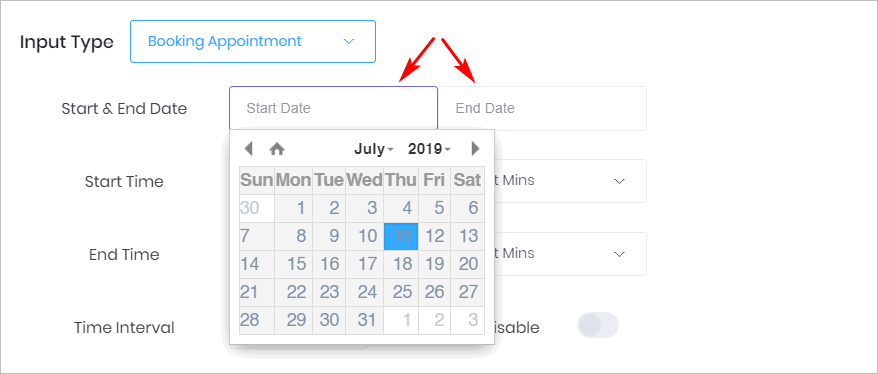
Set the time period for your event, service, or consultation.
- Click the Start Date box. A calendar displays.
- Click the start date.
- Repeat for End Date.
- If there is no specific end time, select an end date 1 or 2 years in the future.
Start and End Times
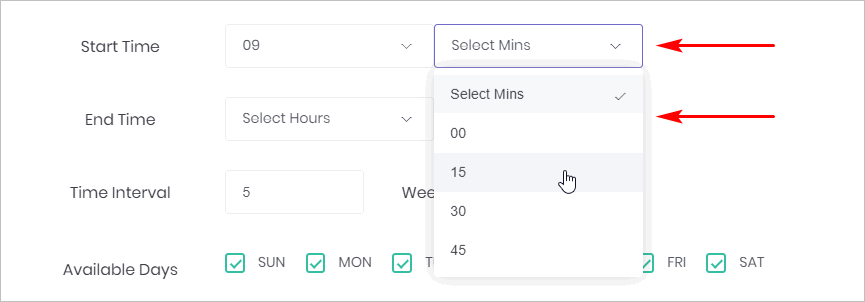
Set the time your event or service is open to the public. Click the hour and minute boxes for both Start and End times.
Time Interval
This sets the amount of time provided for each meeting with a sales lead or client.

Available Days
Choose which days your sales leads and clients can book an appointment.
- Check the days you are available.
- Check the Weekend disable toggle to prevent booking on Saturdays and Sundays.

Block Multiple Bookings
This feature lets you choose how many appointments can be booked for each time slot. The default is 1. That means only one sales lead or client can book an appointment at 10 am, for instance. You can change the default setting.
- Click the Block Multiple Bookings toggle. The toggle becomes purple.
- Use the mouse pointer to change the number in the Slots for appointment box.

Error Message
This text displays in the Chatbot when a user tries to book an appointment for a date or time that is not available. Not available could mean the number of slots is full or the user selects a day or time which you have marked as unavailable.
- Click the Error Message box.
- Type a short custom message.

Success Message
This text displays in the Chatbot when a user has successfully booked an appointment.
- Click the Success Message box.
- Type a short custom message.

Calendar Details
You can insert appointment information which can be saved by the user in their calendar.
- Click each box with the mouse pointer.
- Type a short custom message.

3 Previewing the Chatbot
After placing the Booking App tool inside one Message block, you can preview the results.
4 Customizing the legal consent
- Click this toggle if you want to add a statement to the Chatbot that verifies a website visitor agrees to your privacy policy.
- For more information see: Adding Legal Consent.

