
Once your Chatbot has been built, the conversation with a user comes to a logical end. This article shows you how to place the End Chat tool inside a Chatbot.
End result
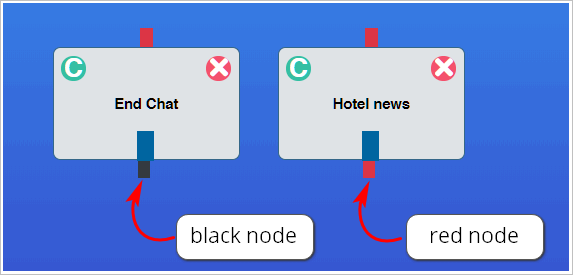
When you activate End Chat, the appearance of the Message block on the Builder page is different. Message blocks normally have a red node on the bottom of the block. The End Chat user response places a black node on the bottom of the block. A black node cannot be connected to another Message block.
1 Opening the Message block
You place the End Chat tool inside a Message block.
- Go to the Builder page.
- Locate the Bot you want to edit and then click Edit on the toolbar. The Builder page displays.
- Locate the Message block that will contain the user response.
- Click the Message block. The Message panel displays.
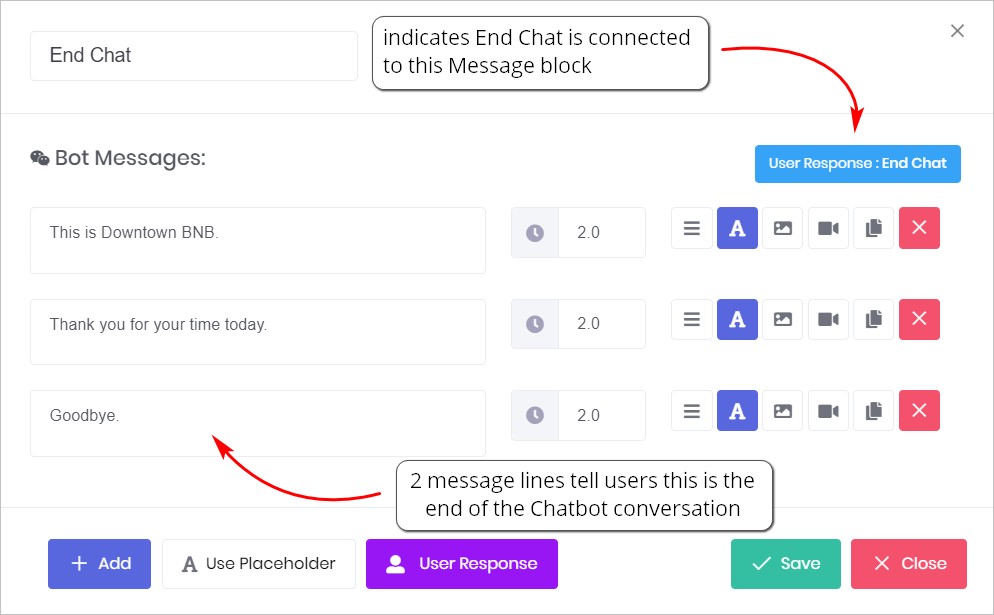
- Click Add to insert a new message line.
- Type a sentence that tells users this is the end of the Chatbot conversation.
2 Inserting the End Chat tool
You place the End Chat tool inside a Chatbot by opening the User Response panel.
For this article, we assume a hotel uses the Chatbot to communicate with guests.
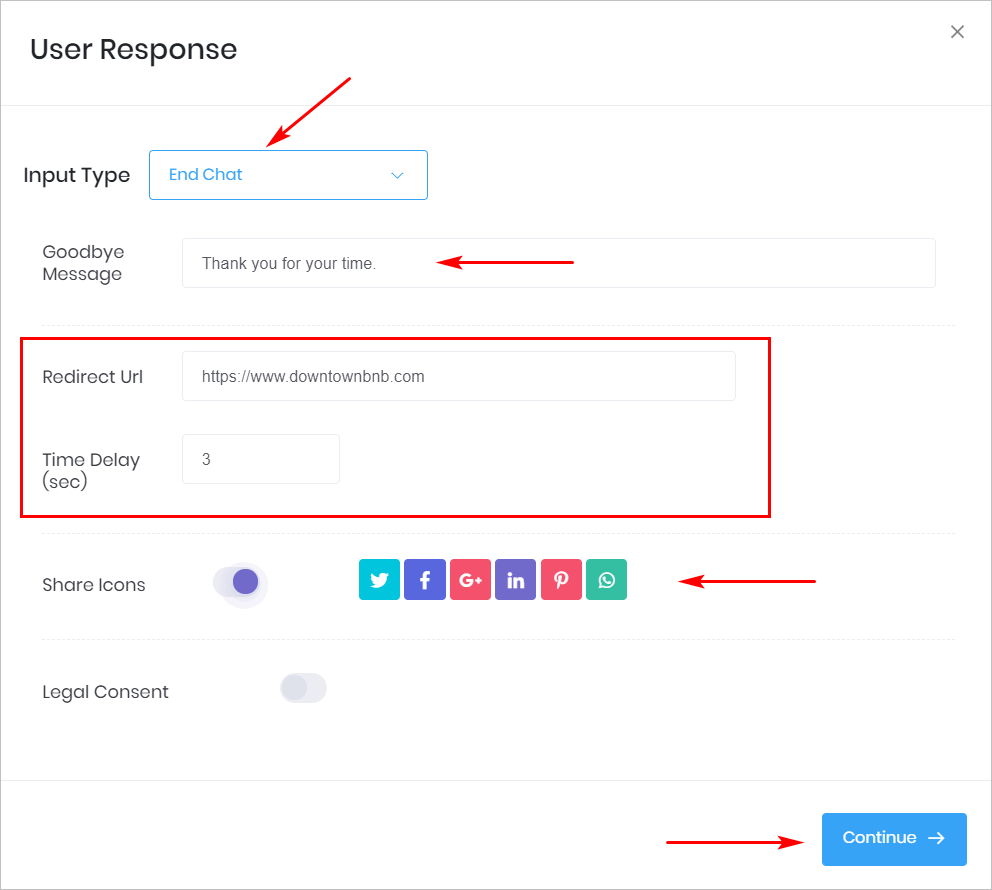
- Click User Response at the bottom of the Message panel. The User Response panel displays.
- Click the box beside Input Type. A drop-down menu displays.
- Select End Chat.
- Type text in the Goodbye Message box (optional).
- Insert a link if you want to activate the Redirect URL (optional).
- If you add a link for the Redirect URL, enter a time delay.
- Click the Share Icons toggle (optional).
- Click Continue. The Message panel displays.
- Click Save.
The End Chat panel includes 2 features discussed in other articles. For more information, see:
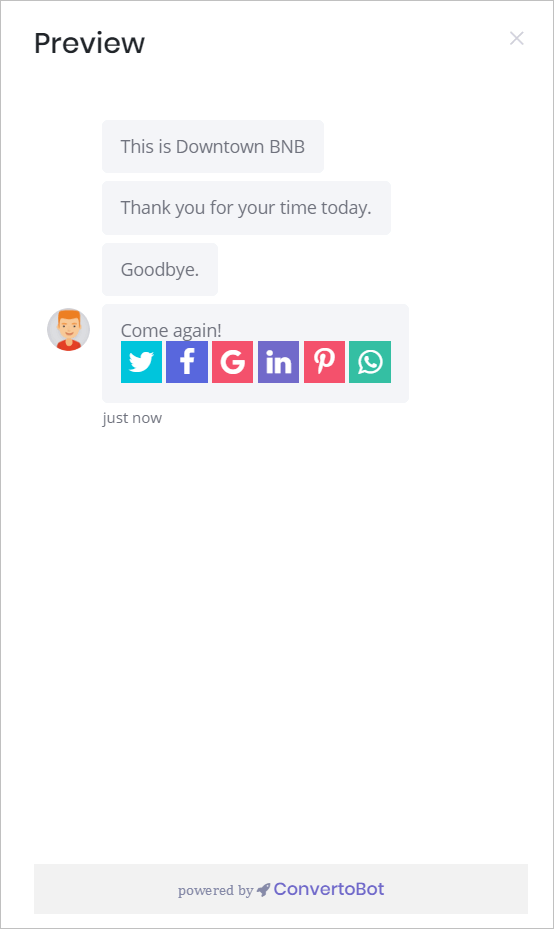
3 Previewing the Chatbot
After placing the End Chat tool inside one Message block, you can preview the results.
4 Customizing consent
Legal Consent
- Click this toggle on the User Response panel if you want to add a statement to the Chatbot that verifies a website visitor agrees to your privacy policy.
- For more information see: Adding Legal Consent.