In some cases, you want to ask website visitors to select a date. This article shows you how to place a Date Picker inside a Chatbot.
Selecting a date
There many scenarios which might require a website visitor to select a date in the past or future:
- prove age by selecting a birth date and year
- identify the date of a past accident, product purchase, or incident
- book a time for a future appointment
The Date Picker asks users to select a date. In some cases, you might want to ask users to select a date and time. To collect both types of information you need to place two separate tools — Date Picker and Time Picker — inside two separate Chatbot Message blocks.
For more information, see:
1 Opening the Message block
You place a Date Picker request inside a Message block.
- Go to the Builder page.
- Locate the Bot you want to edit and then click Edit on the toolbar. The Builder page displays.
- Locate the Message block that will contain the user response.
- Click the Message block. The Message panel displays.
- Click Add to insert a new message line.
- Type a sentence that asks visitors to select a date.
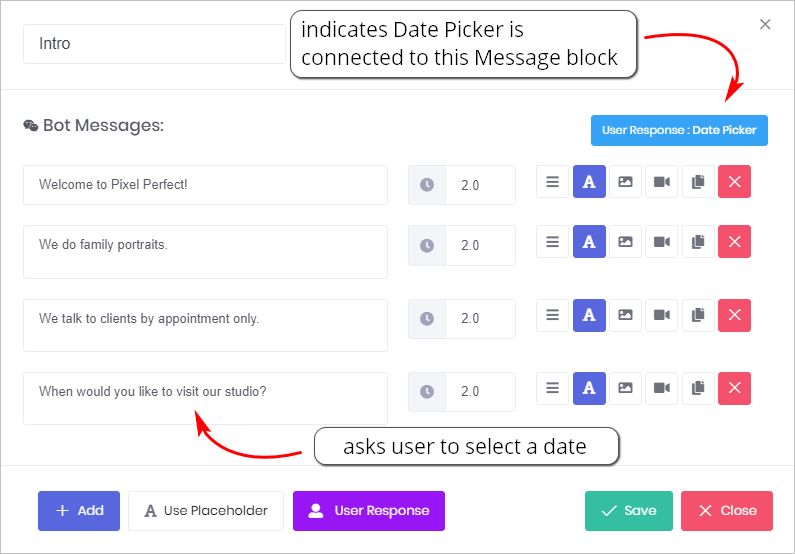
2 Inserting the Date Picker tool
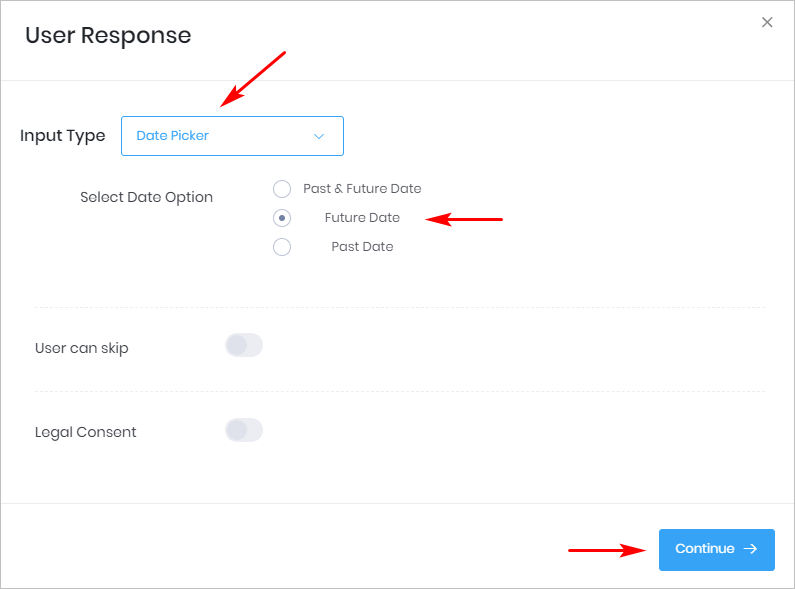
You place the Date Picker tool inside a Chatbot by opening the User Response panel.
For this article, we assume a photography studio uses the Chatbot to book sales leads for studio appointments. For that reason, step 4 below mentions Future Date.
- Click User Response at the bottom of the Message panel. The User Response panel displays.
- Click the box beside Input Type. A drop-down menu displays.
- Select Date Picker.
- Beside Select Date Option, click Future Date.
- Click Continue. The Message panel displays.
- Click Save.
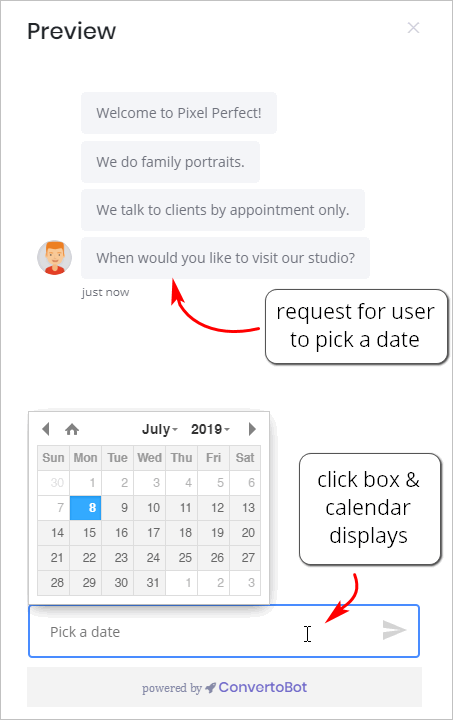
3 Previewing the Chatbot
After placing a Date Picker inside one Message block, you can preview the results.
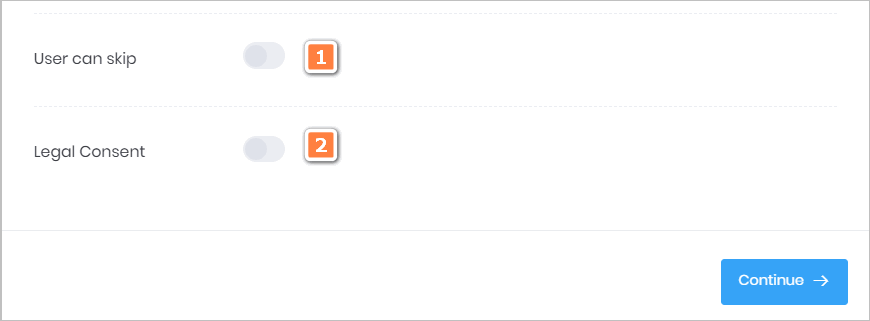
4 Customizing the request
The User Response panel has 2 customisation features.
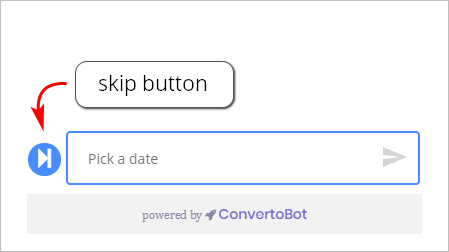
1 User can skip
- Click this toggle if you want to make a selection optional rather than required. In most cases, this option won’t be used because you want users to make a choice.
- The toggle places a blue button near the bottom of the Chatbot (see image below).
2 Legal Consent
- Click this toggle if you want to add a statement to the Chatbot that verifies a website visitor agrees to your privacy policy.
- For more information see: Adding Legal Consent.