This article shows you how to insert a text input user response.
- A user response takes place when the Chatbot asks a website visitor for information. That request could be clicking a button, selecting a menu item, or choosing a day on a date picker. Text input is just one kind of user response.
Text input
There are 8 text input tools. Basically, they all ask website visitors to do the same thing: type words or numbers into a box.
The 8 text input options are:
- Address
- Custom Text
- Email Address
- Full name
- Mobile Number
- First Name
- Last Name
- Password
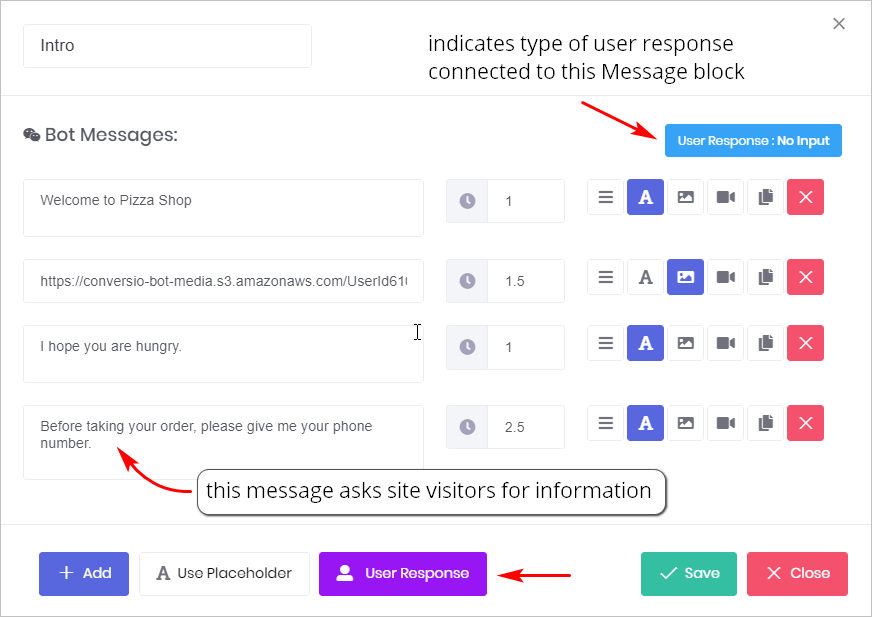
1 Opening the Message block
You place a user response inside a Message block. A Message block can contain only one user response.
- Go to the Builder page.
- Locate the Bot you want to edit and then click Edit on the toolbar. The Builder page displays.
- Locate the Message block that will contain the user response.
- Click the Message block. The Message panel displays.
- Click Add to insert a new message line.
- Type a sentence that asks visitors to respond to a prompt.
The image below shows a Message block with 4 message lines. The blue box in the top right corner tells us that no user response has been set up for this Message block.
The last message line — give me your phone number — is the request that displays on the Chatbot. We need to insert a text input to digitally create this request and collect the data.
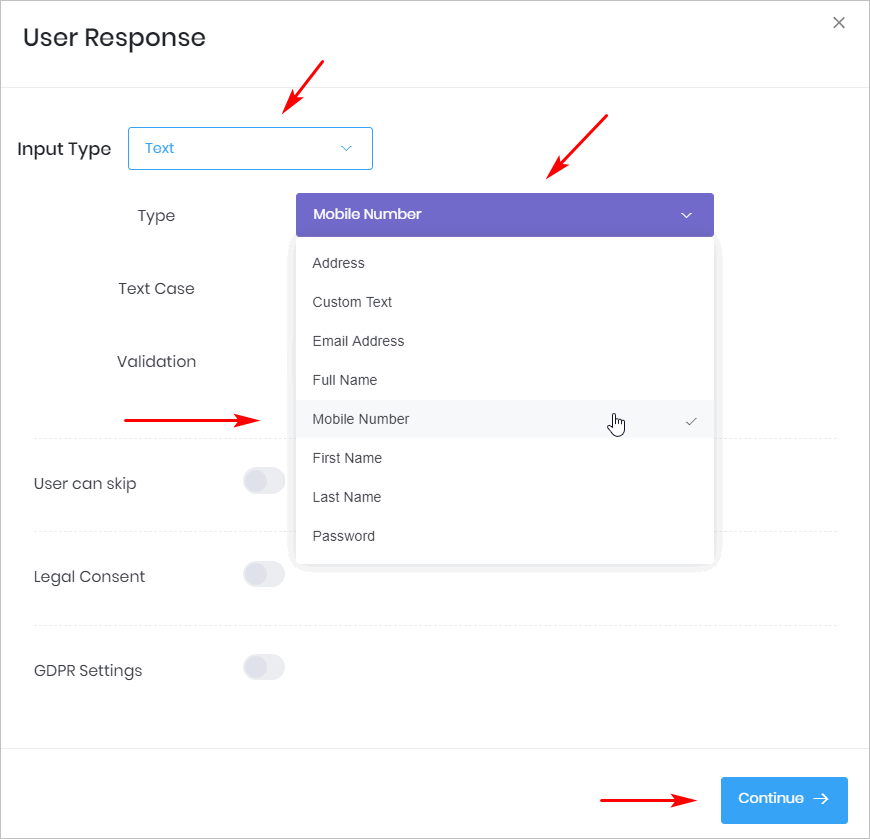
2 Inserting text input
In this example, we show you how to create a text input with a mobile number. The process is the same for the other text input options.
- Click User Response at the bottom of the Message panel. The User Response panel displays.
- Click the box beside Input Type. A drop-down menu displays.
- Select Text.
- Click the box beside Type. A drop-down menu displays.
- Select Mobile Number
- Click Continue. The Message panel displays.
- Click Save.
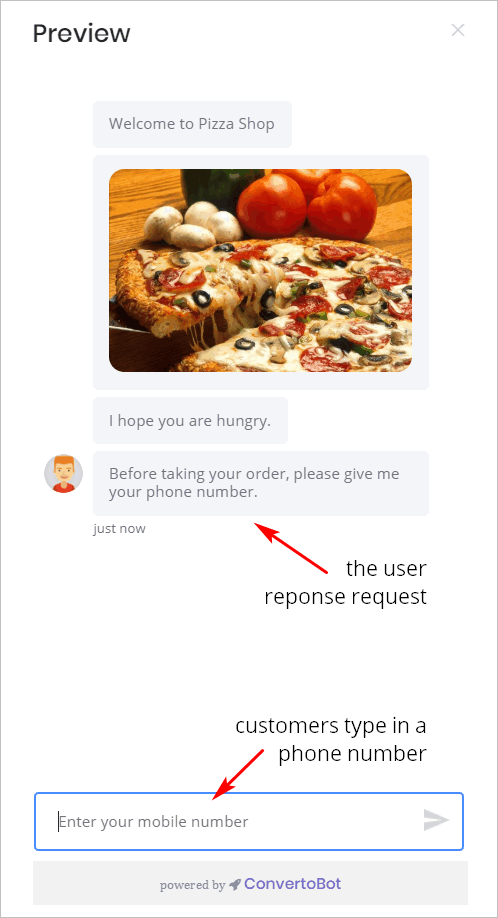
3 Previewing the Chatbot
After placing one user response inside one Message block, we can preview the results.
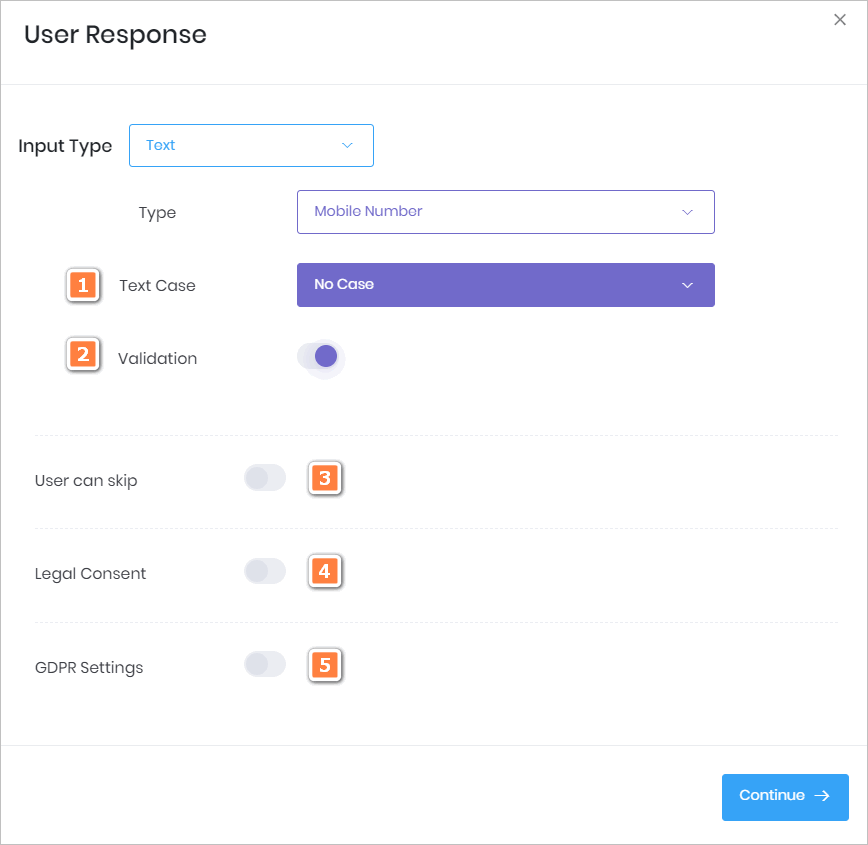
4 Customizing text input
The User Response panel has 5 customisation features.
1 Text Case
- This feature changes the display of words in the Chatbot. The default is No Case. That means letters and words display in the Chatbot as written by the user.
- The other options are Capitalize Each Word, Lower Case, and Upper Case.
2 Validation
- Click this toggle if you want the Chatbot system to assess the input against a standard. This is a useful tool to make sure website visitors type in a properly formatted email address, for instance.
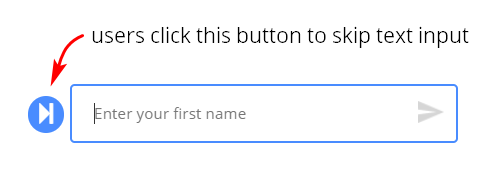
3 User can skip
- Click this toggle if you want to make text input optional rather than required.
- The toggle places a blue button beside the Chatbot’s text input box (see image below).
4 Legal Consent
- Click this toggle if you want to add a statement to the Chatbot that verifies a website visitor agrees to your privacy policy.
- For more information see: Adding Legal Consent.
5 GDPR Settings
- Click this toggle if you want to add a statement to the Chatbot that verifies a website visitor accepts your GDPR Compliance document.
- Selecting this setting is important if you collect personal information, like an email address.
- For more information see: Adding Legal Consent.