This article shows you how to create a Chatbot user response by adding buttons.
- A user response takes place when the Chatbot asks a website visitor for information. That request could be text input, selecting a menu item, or choosing a day on a date picker. Clicking a button is just one kind of user response.
End result
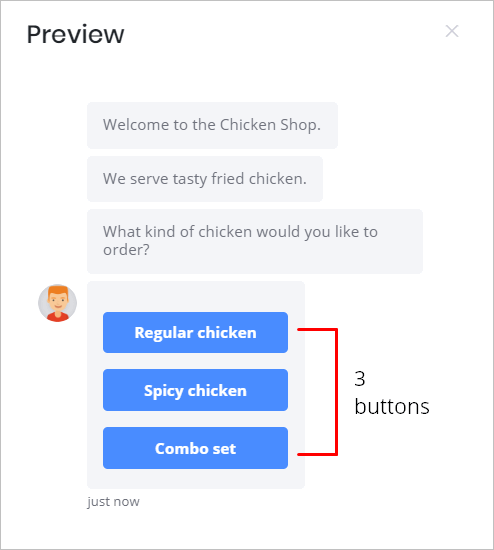
A Chatbot with buttons might look like the image below. Typically, the user is given a set of options. Each option is a button with a small amount of text. The Chatbot flow continues after the user clicks an option.
1 Opening the Message block
You place a user response inside a Message block.
- Go to the Builder page.
- Locate the Bot you want to edit and then click Edit on the toolbar. The Builder page displays.
- Locate the Message block that will contain the user response.
- Click the Message block. The Message panel displays.
- Click Add to insert a new message line.
- Type a sentence that asks visitors to respond to a question.
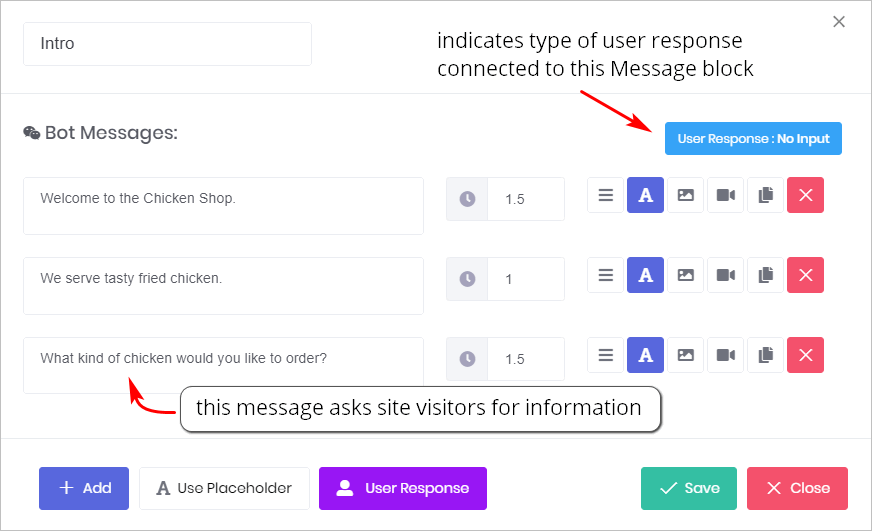
The image below shows a Message panel with 3 message lines. The blue box in the top right corner tells us that no user response has been set up for this Message block.
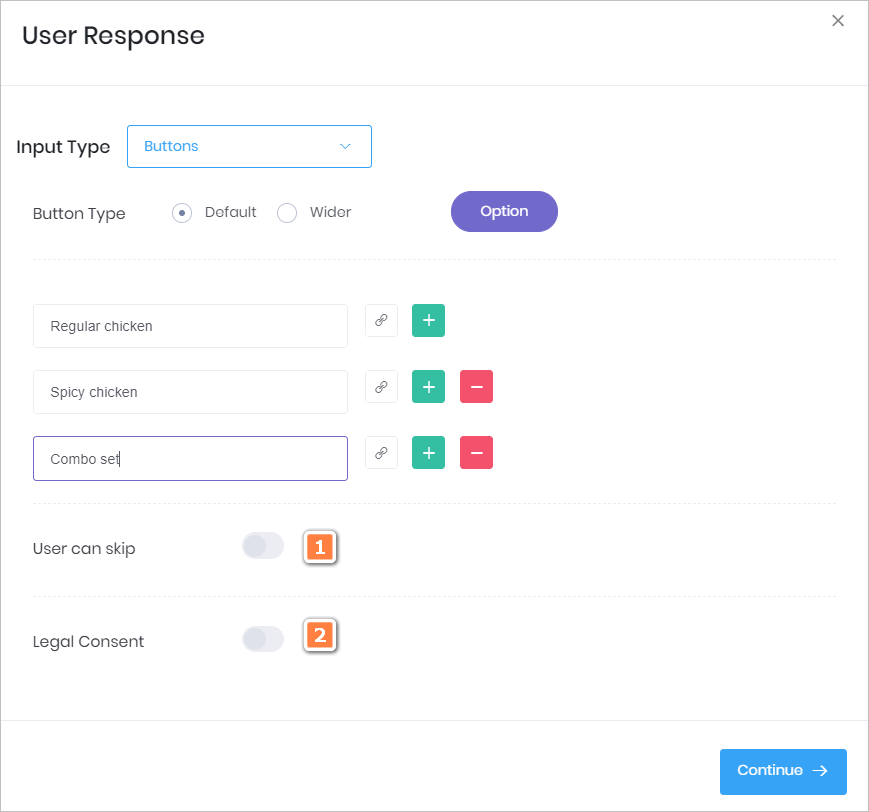
2 Inserting buttons
In this example, we show you how to add 3 buttons that offer website visitors a menu choice.
You create a card by adding a line of text in the User Response panel. In the image below, there are 3 lines. That means the Chatbot will display 3 buttons.
- Click User Response at the bottom of the Message panel. The User Response panel displays.
- Click the box beside Input Type. A drop-down menu displays.
- Select Buttons.
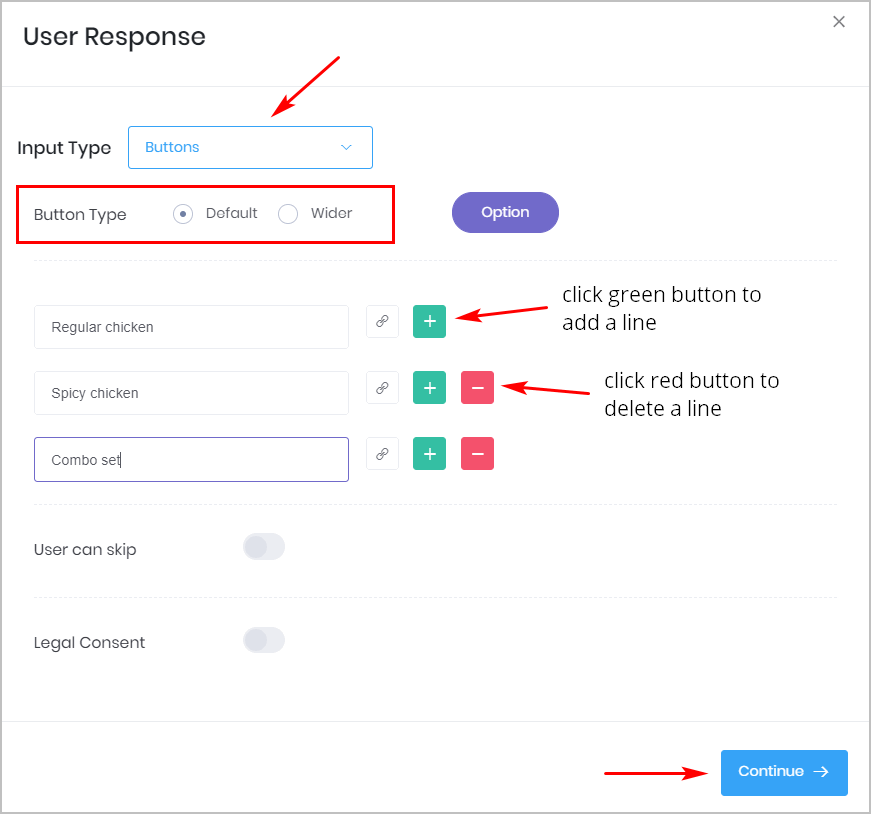
- For Button Type, leave the Default option or select Wider. The Wider option stacks buttons in the Chatbot. Default places buttons side-by-side if there is enough space.
- In the Option box, type text to appear in the first button.
- Click the green + button to add a new button. A new text box displays.
- Type text for the second button.
- Add new button text as required.
- When finished adding buttons, click Continue. The Message panel displays.
- Click Save.
3 Adding Message blocks
You need to create a new Message block for each user response option presented in the Chatbot. Each Message block carries the conversation along a different path.
The example in this article has 3 options (i.e. Regular chicken, Spicy chicken, and Combo set). That means we need to create 3 new Message blocks, one for each menu item.
- Go to the Builder page. Now you are on the blue workspace.
- Click Add Block on the menu. A new Message block displays on the blue workspace.
- Click the new Message Block. The Message panel displays.
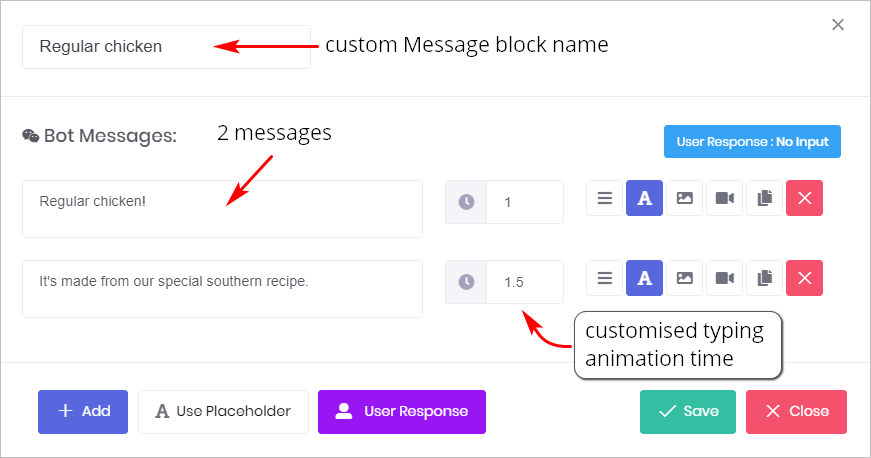
- In the top left corner, type in a new unique name for the block.
- Add one or two message lines.
- Adjust the typing animation time, if required.
- Click Save. The Message panel closes and the Builder page displays.
- Repeat process for each new Message block.
The image below shows a Message block that will be connected to one button (Regular chicken). A similar block should be created for each of the other 2 buttons (i.e. Spicy chicken and Combo set).
4 Linking Message blocks
The next step is to link each Message block on the Builder page. If Message blocks are not linked, the Chatbot does not work.
Builder page overview
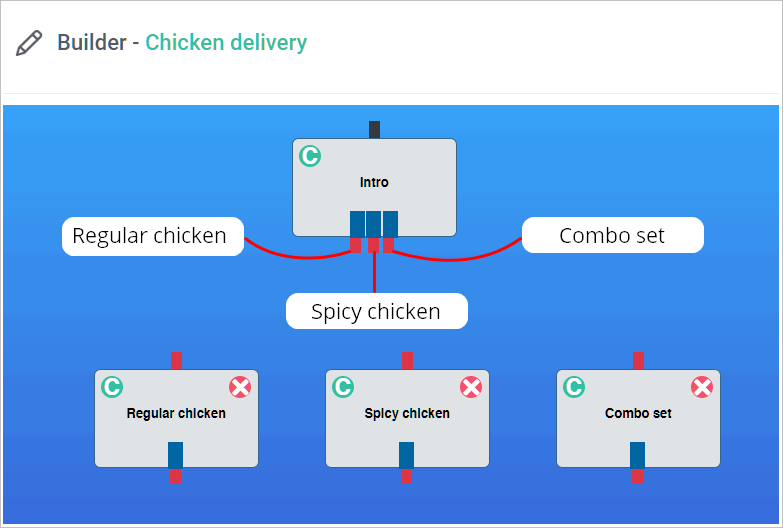
The image below shows the structure of our Chatbot on the Builder page.
- There is one Intro Message block. It contains the user response (buttons) and 3 options. We know there are 3 user response options by counting the nodes at the bottom of the Message block; one node per option.
- We also know the name associated with each node. When you create user response options (Step 2 above), the first option is the node on the far left. The second option is to the right side of the first node. The same process repeats for every other node.
There are 3 separate Message blocks — each with a unique name.
Linking Message blocks
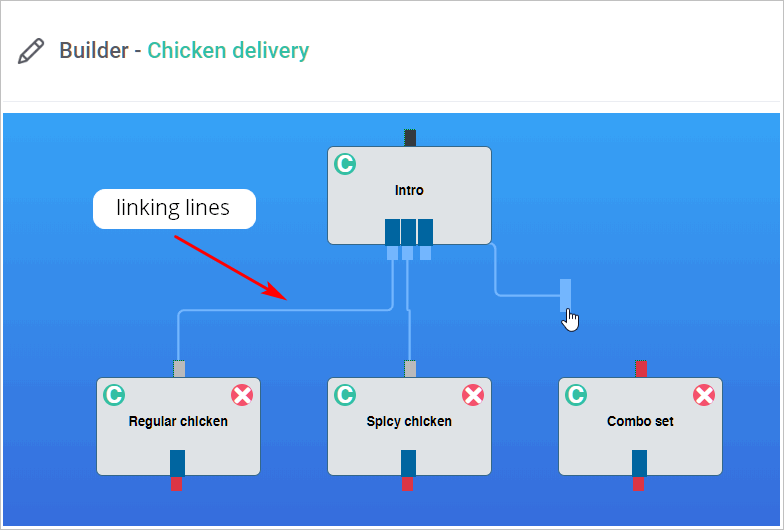
The final step is to link each node to the correct Message block.
- Click a node under the Intro block.
- Drag it to the correct Message block.
For more information about, see:
- Linking Message blocks
5 Previewing the Chatbot
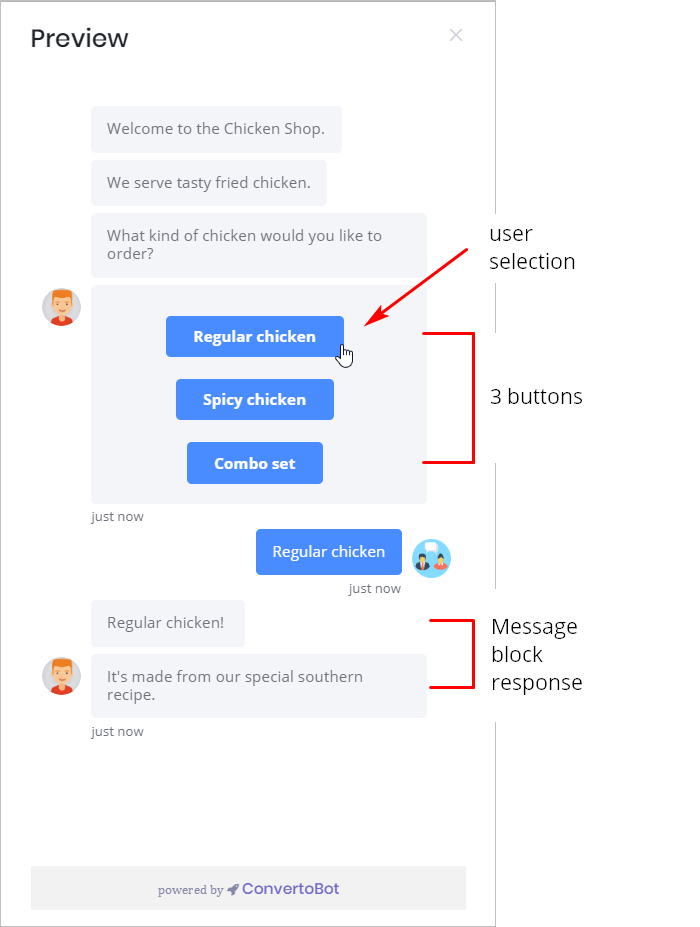
After placing one user response inside one Message block, we can preview the results.
6 Customizing buttons
The User Response panel has 2 customisation features.
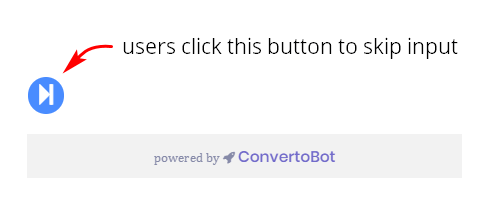
1 User can skip
- Click this toggle if you want to make button selection optional rather than required. In most cases, this option won’t be used because you want users to make a choice.
- The toggle places a blue button near the bottom of the Chatbot (see image below).
2 Legal Consent
- Click this toggle if you want to add a statement to the Chatbot that verifies a website visitor agrees to your privacy policy.
- For more information see: Adding Legal Consent.