This article shows you how to use the Autofill tool in a Chatbot.
1 Opening the Message block
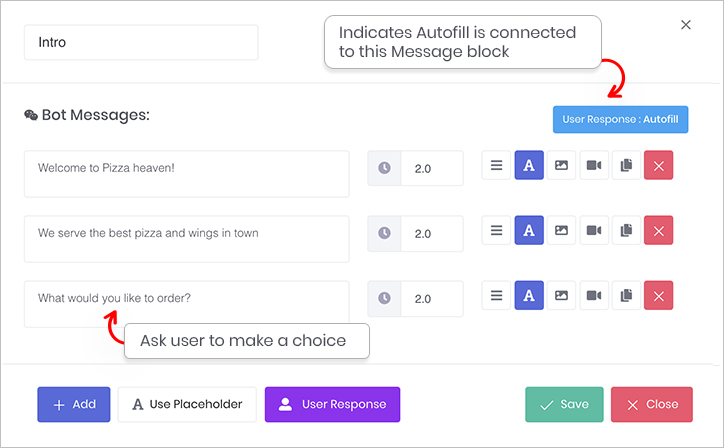
You start by placing a question inside a Message block.
- Go to the Builder page.
- Locate the Bot you want to edit and then click Edit on the toolbar. The Builder page displays.
- Locate the Message block that will contain the user response.
- Click the Message block. The Message panel displays.
- Click Add to insert a new message line.
- Type a question that asks users to make a choice.

Autofill_Bot Message
2 Inserting autofill
You place the Autofill tool inside a Chatbot by opening the User Response panel.
For this article, we assume a pizza restaurant uses a Chatbot to take food orders from online customers.
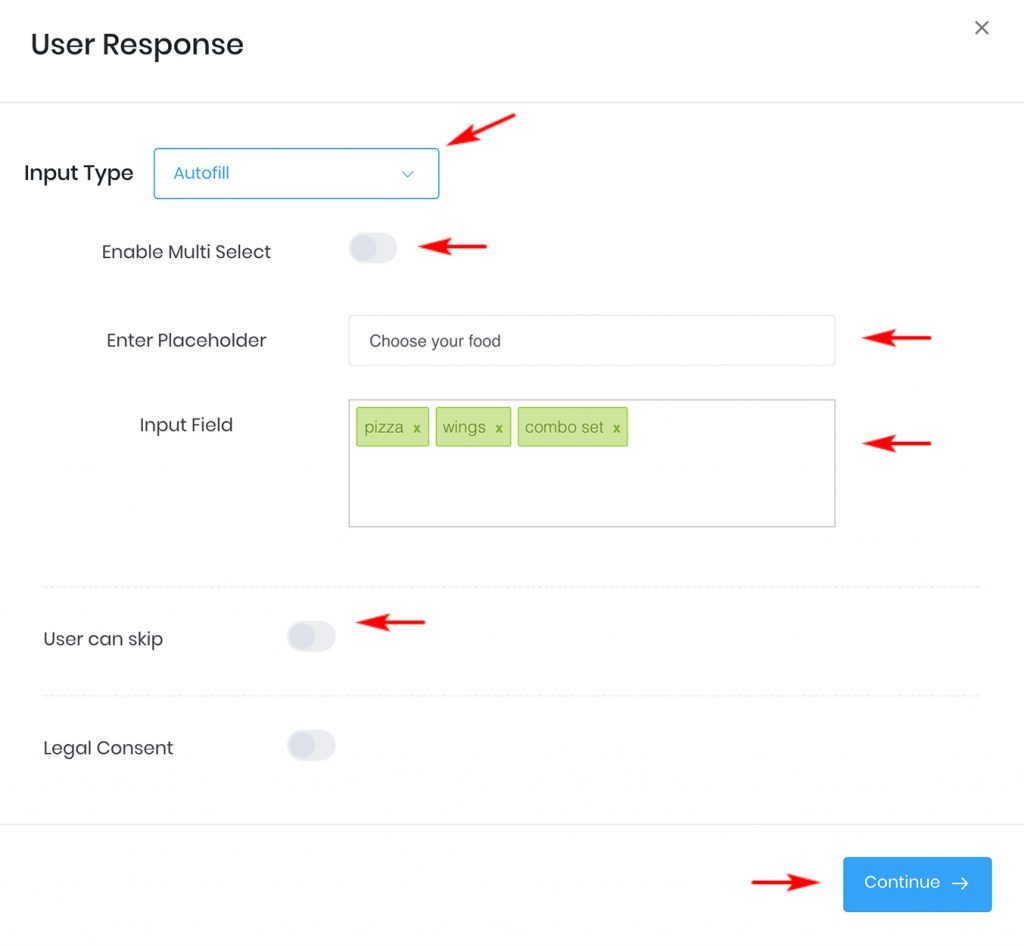
- Click User Response at the bottom of the Message panel. The User Response panel displays.
- Click the box beside Input Type. A drop-down menu displays.
- Select Autofill.
- Configure the settings. (see below)
- Click Continue. The Message panel displays.
- Click Save.

Autofill_User response
Enable Multi Select
Click this toggle to the ON position to allow users to select more than one option from the list of multiple choice answers.
Enter Placeholder
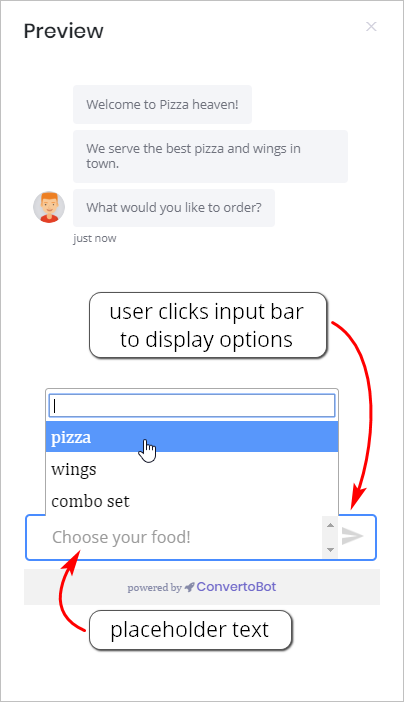
Enter the text that displays inside the input bar at the bottom of a Chatbot.

Select Input
- Enter your responses to the multiple choice question.
- Type an answer and then hit the Return bar on the keyboard to input one option.
User can skip
Click this toggle to the ON position to allow users to avoid selecting an answer. In most cases, it makes sense to leave the toggle in the OFF position because you want the user to select an option.
3 Previewing the Chatbot
After placing the Autofill tool inside one Message block, you can preview the results.

4 Customizing the legal consent
Click this toggle if you want to add a statement to the Chatbot that verifies a website visitor agrees to your privacy policy.
For more information see: Adding Legal Consent.

