This article shows you how to customize Widget settings. Customizing these settings helps you control when and how a Chatbot displays on a webpage. Some of these tools are Extreme Features, which are available only to premium customers.
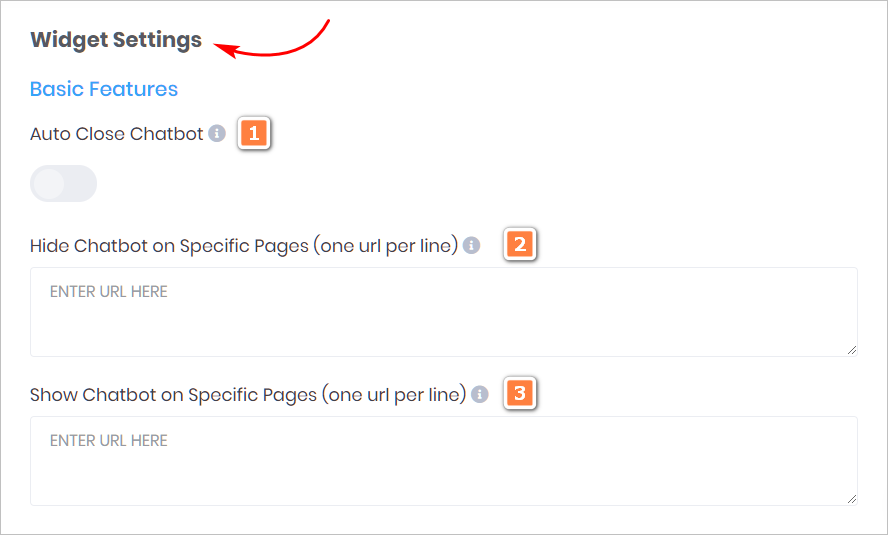
1 Locating basic widget features
This step shows you how to customize Basic Features available to all customers.
- Go to the Settings page.
- Scroll down to the Widget Settings header on the left side of the page.
- Locate the Basic Features header.
- Customize the settings (see below for details)
- Click Save at the top or bottom of the page.

1 Auto Close Chatbot
Click the toggle to the ON position to activate this feature. At the end of a chat, the Chatbot closes automatically.
There are times when you might want to not activate this feature. At the end of a chat, for instance, you display an affiliate link. You would want that link to remain on the page in order to increase the possibility of a click-through.
2 Hide Chatbot on Specific Pages
By default, the Chatbot displays on all of your webpages. You can customize that display.
- Paste the URL of each page you do not want to display the Chatbot.
- If you have multiple pages, paste each URL on a separate line in the box.
3 Show Chatbot on Specific Pages
This feature is the opposite of #2 above. This feature remains inactive until you enter a URL if the box. Pages not listed in the box do not display the Chatbot.
- Paste the URL of each page you want to display the Chatbot.
- If you have multiple pages, paste each URL on a separate line in the box.
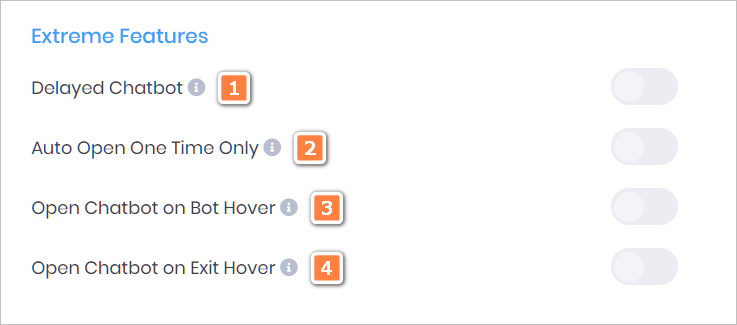
2 Locating Extreme widget features
This step shows you how to customize tools available to customers with access to Extreme Features.
- Scroll down to the Widget Settings header on the left side of the page.
- Locate the Extreme Features header.
- Customize the settings (see below for details)
- Click Save at the top or bottom of the page.

1 Delayed Chatbot
By default, the Chatbot displays as soon as a user lands on a page. You can delay that Chatbot appearance.
- Click the toggle to the ON position to activate a delay. The Set Delay Time box displays.
- Choose the delay period, measured in seconds, by clicking the Up or Down arrows.
2 Auto Open One Time Only
By default, the Chatbot displays on every page during a visitor’s session. You can change that frequency.
Click the toggle to the ON position to activate this feature. When activated, the Chatbot displays only once per visitor session.
3 Open Chatbot on Bot Hover
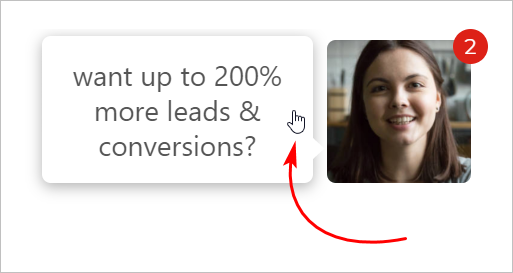
By default, the Chatbot starts when a user clicks the Overlay Text or icon. You can change that engagement process.
Click the toggle to the ON position to activate this feature. When activated, the Chatbot starts when the user’s mouse pointer hovers on the Chatbot Overlay Text or icon.

4 Open Chatbot on Exit Hover
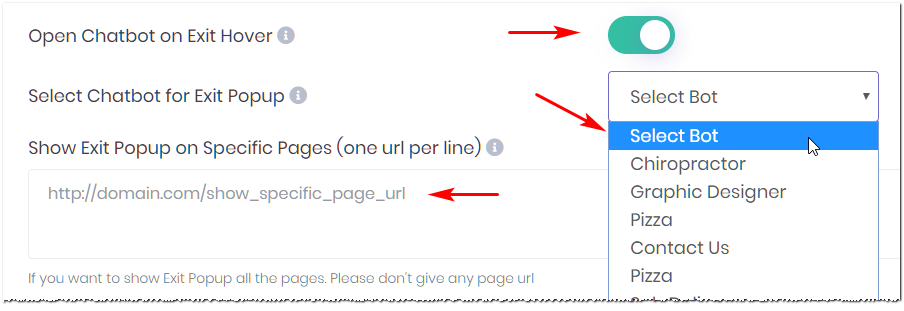
This feature allows you to display a pop-up box when the user is going to exit a page. Exit means the mouse moves in a way that suggests the user is ready to leave your site. Before the user leaves, display a pop-up box with a message or offer.
To work effectively, you need to create an Exit Bot that targets these users with a unique offer (e.g. Before you leave, here is a 10% discount on our product).
- Click the toggle to the ON position to activate this feature. The Select Bot menu displays.
- Select a Bot to display in the exit pop-up box.
- To limit the pop-box usage, enter the URL for each page you want the pop-box to display. The pop-up box displays only on the pages listed in this box.

