
There are several design tools that let you customize the appearance of your Chatbot. This article shows you how to customize the design and color of Chatbot messages.
1 Customizing message bubbles
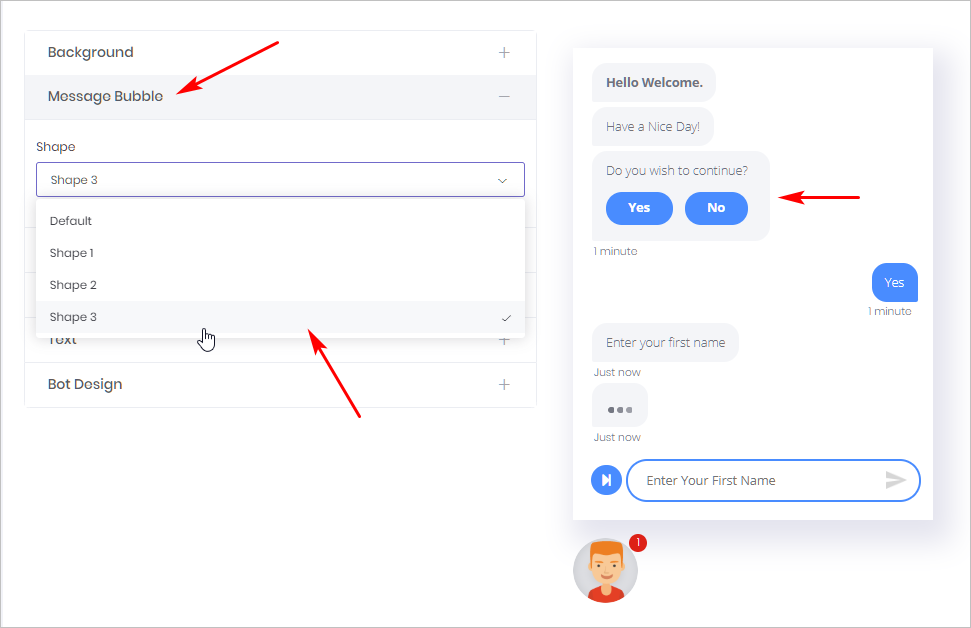
A message bubble is a box that hold Chatbot text. You can customize the shape of message bubbles.
- Open the Design page.
- Go to the toolbox on the left side of the page.
- Click Message Bubble. The box expands.
- Select an option. Review changes in the preview panel.
- After selecting the final option, click Save at the top of the page.
2 Customizing Bot message color
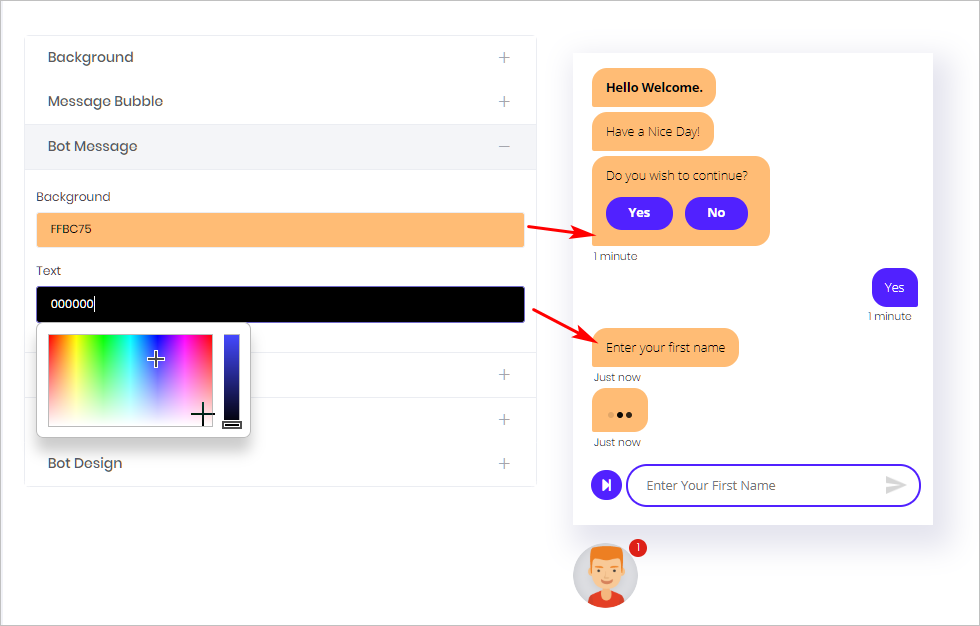
Each message bubble has two colors: one for the background and one for the Chatbot text. You can customize both colors.
- Go to the toolbox on the left side of the page.
- Click Bot Message. The box expands.
- Click the box under Background. A color picker displays.
- Select a color for the bubble background.
- Click the box under Text. A color picker displays.
- Select a color for the bubble text.
- After selecting the final options, click Save at the top of the page.
3 Saving and previewing the Chatbot
You save your work by clicking the Save button at the top of the page. There is no Preview button for your Chatbot on the Design page. Instead, use a workaround to preview your Chatbot.
- Click the Next button at the top of the page. The page changes.
- Click Next again. The page changes.
- Click View in the top right corner of the page.
- A new page displays your Chatbot in full.
