This article shows you how to add blocks — and give them new names — while building a Bot. You can use these skills while working on a template or building a Bot from scratch.
About the first block
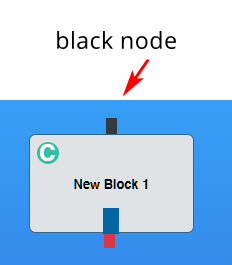
While working on the Builder page, you will notice the first block of a Bot is different in 2 ways.
- Unlike all other unconnected blocks, the first block has a black node on top. That means you cannot link other blocks to the top of the first block.
- Unlike other blocks, you should not delete the first block. If you remove the first block, the entire Bot will be removed.
1 Adding a block
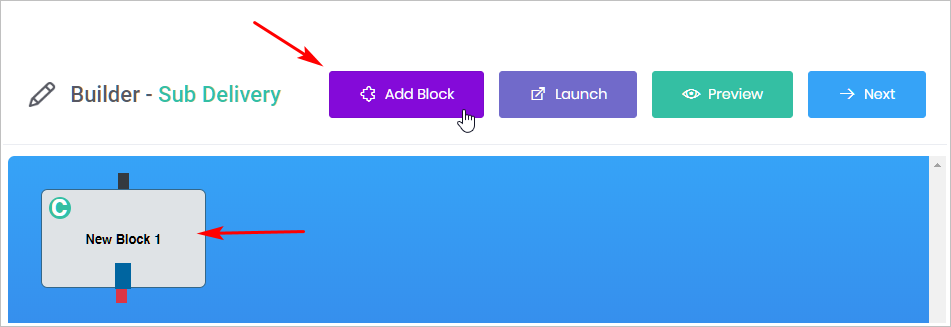
- Go to the Bot Builder page.
- Scroll up to the menu at the top of the page.
- Click Add Block. A new block is placed on the blue workspace.
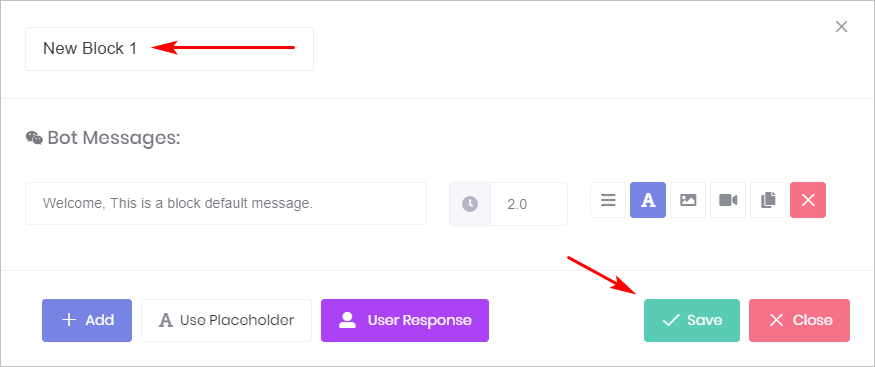
2 Renaming a block
New blocks have a generic name. It’s good practice to give each block a name that helps you remember the content of the block. Generally, it’s a good idea (but not required) to name the first block as Intro.
- Click the new block on the workspace. The Message panel displays.
- Locate the block name in the top left corner of the Message panel.
- Click once on the name and then enter the new name.
- Click Save. The Message panel closes. The new block appears on the blue workspace with the new name.