This article shows you how to customize email notification settings. Each time a user engages with your Chatbot, you receive a notification. These Basic Features are available to all Chatbot customers.
- These notifications are generated automatically by the Chatbot system. They are sent only to you. Your customers, sales leads, and users do not receive these messages.
1 Locating notification settings
- Go to the Settings page.
- Scroll down to the Email Notification Settings header on the left side of the page.
- Customize the settings (see below).
- Click Save at the top or bottom of the page.
The default setting is OFF. When OFF, the customization features are hidden.

2 Customizing notification settings
- Click the toggle to turn ON email notifications. Three notification features display on the page.
- Customize the settings (see below).
- Click Save at the top or bottom of the page.
1 Email Subject
Enter an email message subject. This is the subject line for each email notification that you receive.

2 Notification Email Addresses
Enter the email address(es) that will receive notification messages. Enter as many addresses as you want. Each address must be on a separate line.

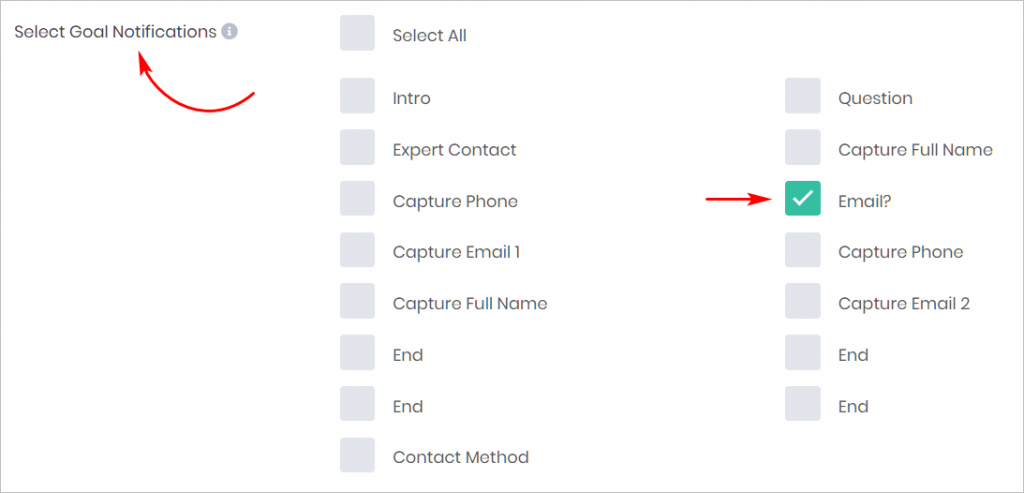
3 Select Goal Notifications
Depending on the site, the number of email notifications could be overwhelming. To reduce the number of messages, you can choose when to receive an email notification.
Notifications can be sent out when a user reaches a specific point in the Chatbot flow. These specific points are Message blocks.
In the example below, we receive an email notification each time a user engages with a Message block that asks for an email address.
- A notification is sent when a user engages with the Message block and not when the user submits an email address.
You can select multiple goal boxes. The number and type of goal boxes on your Settings page will likely be different from the example below. That’s because the design and complexity will be different; there is one goal box for each Message block in the Chatbot.

