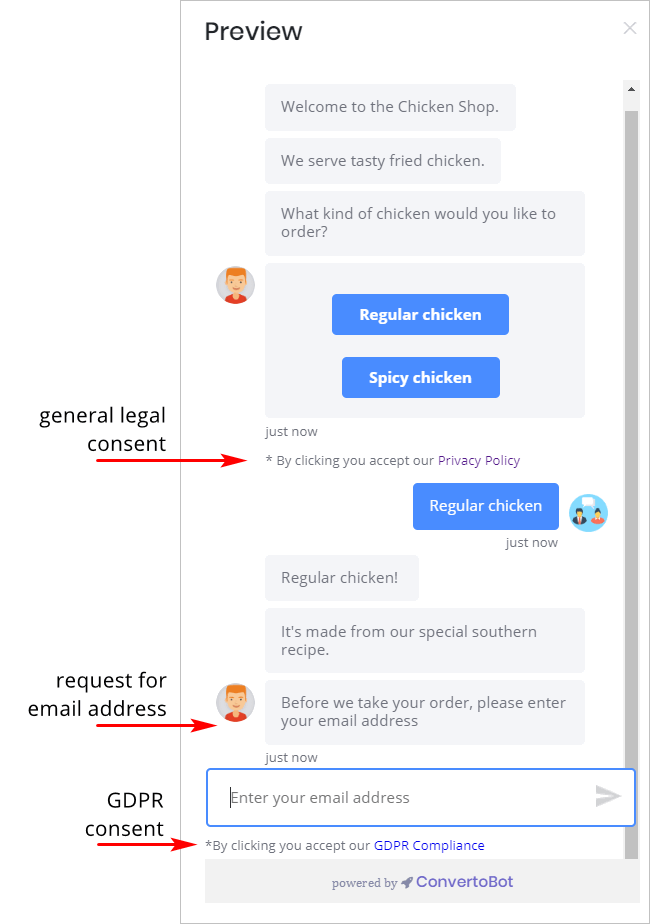
This article shows you how to add legal consent to a Chatbot message. Legal consent means a website visitor agrees to your conditions or policies with respect to collecting and using user data.
Privacy policy statement
To implement a proper legal consent statement, you need to prepare 2 things:
- a GDPR-compliant privacy policy on your website
- a URL link to your privacy policy
Legal consent options
There are 2 ways to obtain legal consent from a visitor on the Chatbot system.
- One, insert a general statement that says users agree to your privacy policies if they click on something.
- Two, insert a specific statement that says users agree to your GDPR (General Data Protection Regulation) policies if they click on something.
Both methods are described below.
1 Opening a Message block
Legal consent statements are placed inside a Message block.
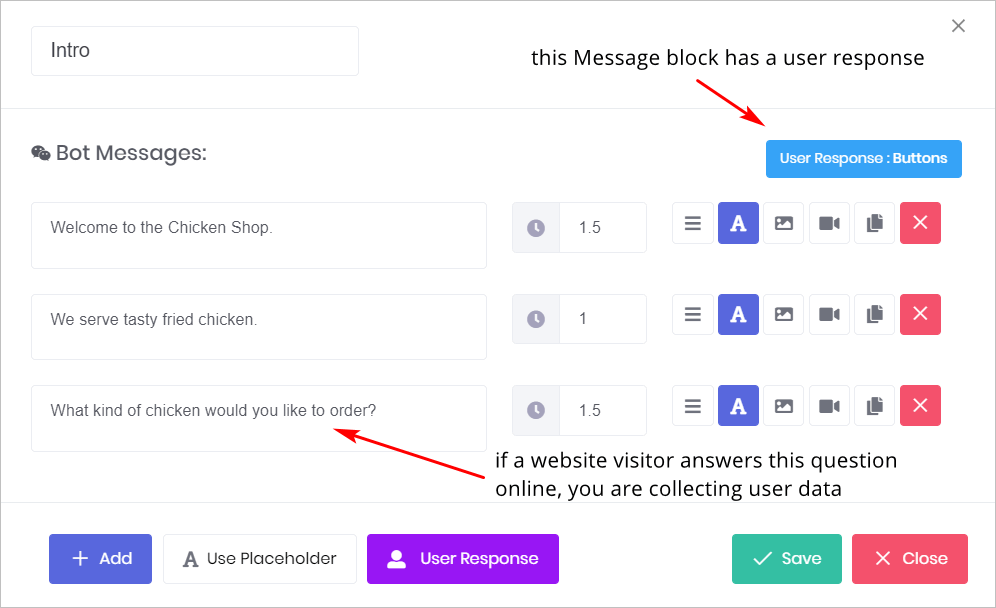
When a user clicks a button to answer a question or types a word in a text box, you are collecting user data. That’s why it’s good practice to add legal consent the first time you ask website visitors for a user response.
- Go to the My Bots page.
- Locate the Bot you want to edit and then click Edit. The Builder page opens.
- Click the Message block which contains the first user response question. The Message panel displays.
2 Inserting general legal consent
With the Message block open, add a general legal consent statement.
- Click the User Response button at the bottom of the Message block. The User Response panel displays.
- Scroll down to the bottom of the panel and click the Legal Consent button. The Legal Consent panel displays.
- Complete the Legal Consent panel.
- Click Continue.
- Click Save.
About the form
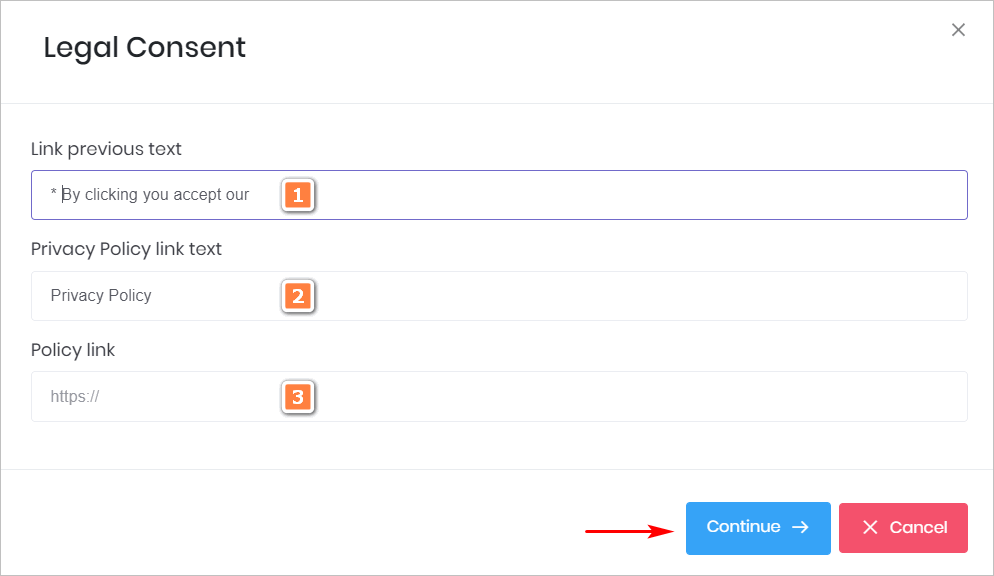
The Legal Consent panel has 3 parts. You can leave the first two parts unchanged or customise them as you wish. The third part requires your input.
- Part 1 is the first section of your privacy statement.
- Part 2 is the last section of the privacy statement. This is the name of the privacy policy document which describes your conditions. This text carries the URL link.
- Part 3 is the URL of your privacy policy document. Type or paste the URL.
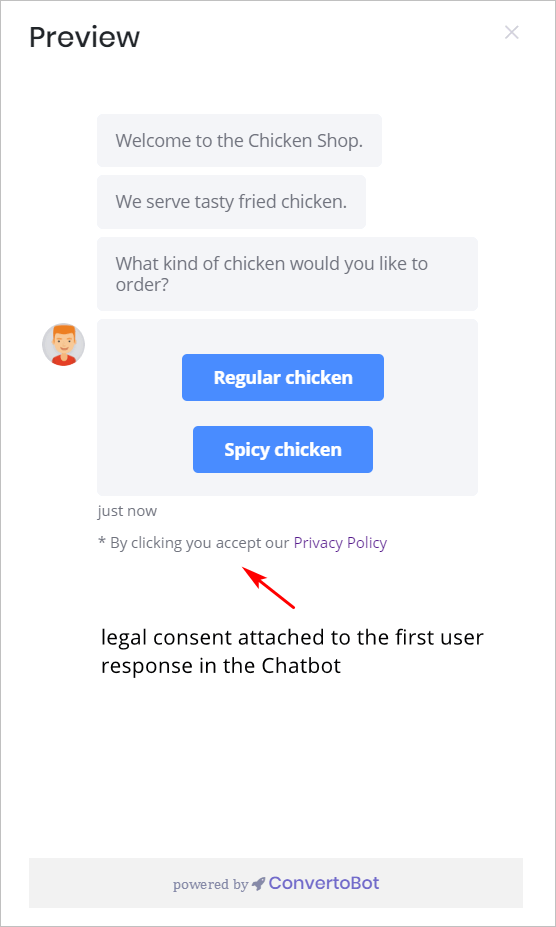
Result
Here is what general legal consent looks like to your website visitors.
3 Inserting GDPR legal consent
You should insert this legal consent statement if you are asking website visitors for an email address or other types of personal information. In this article, we use email as an example.
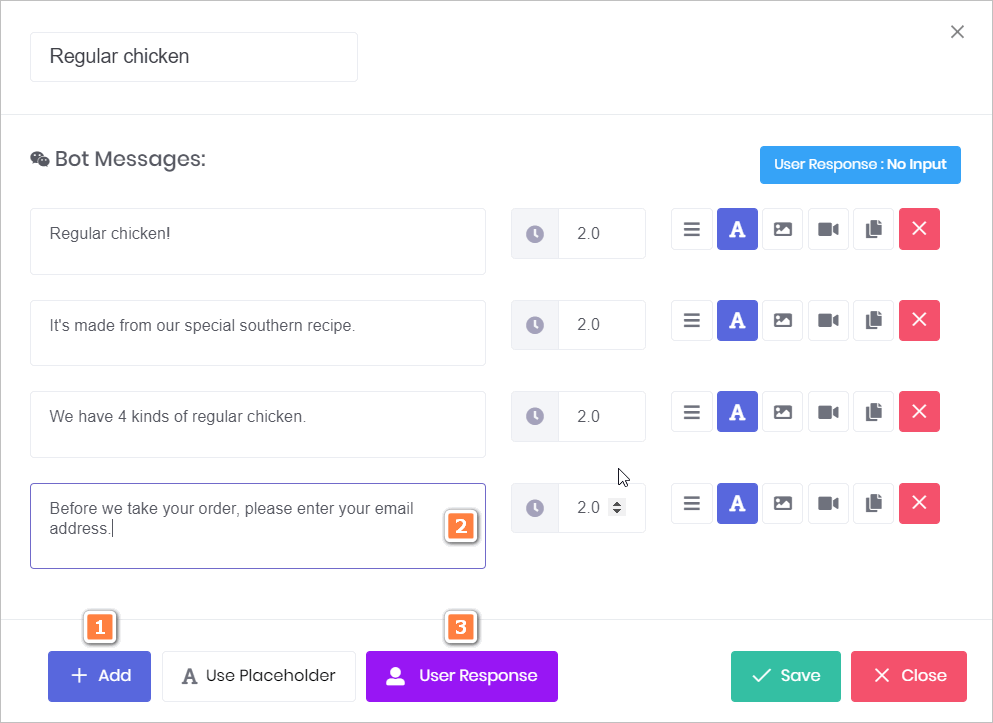
Open the Message block that asks users to enter an email address and then:
- Click Add to insert a blank message line.
- Type your email request.
- Click the User Response button. The User Response panel Opens.
Selecting email address input
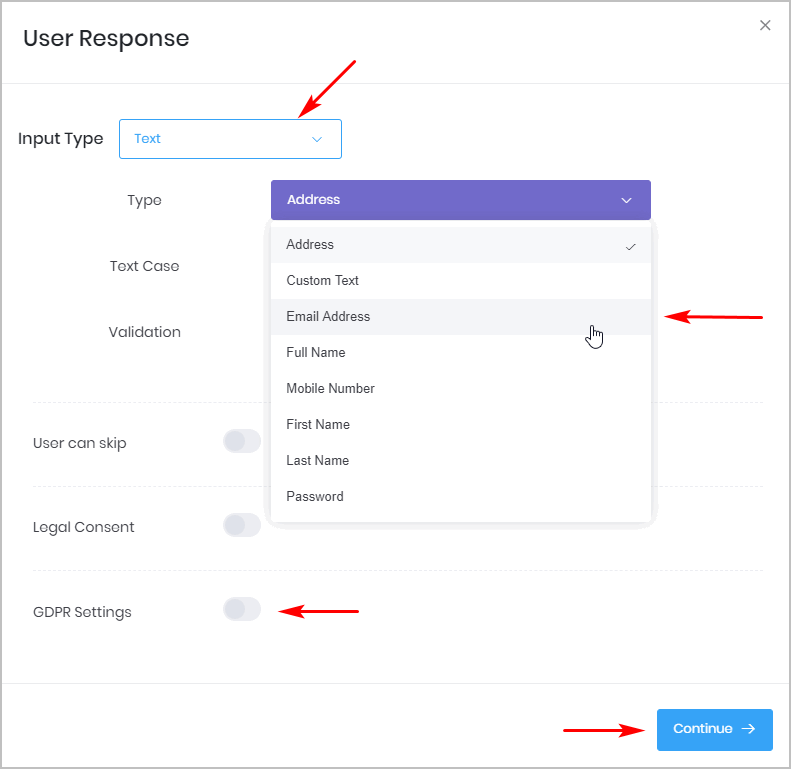
With the User Response panel open, add Email Address as an input.
- Click the box beside Input Type. A drop-down menu displays.
- Select Text.
- Click the box beside Type. A drop-down menu displays.
- Select Email Address.
- Scroll down and click the GDPR Settings toggle. The GDPR Consent panel displays.
- Complete the GDPR Consent panel.
- Click Continue two times.
- Click Save.
Completing the GDPR Consent panel
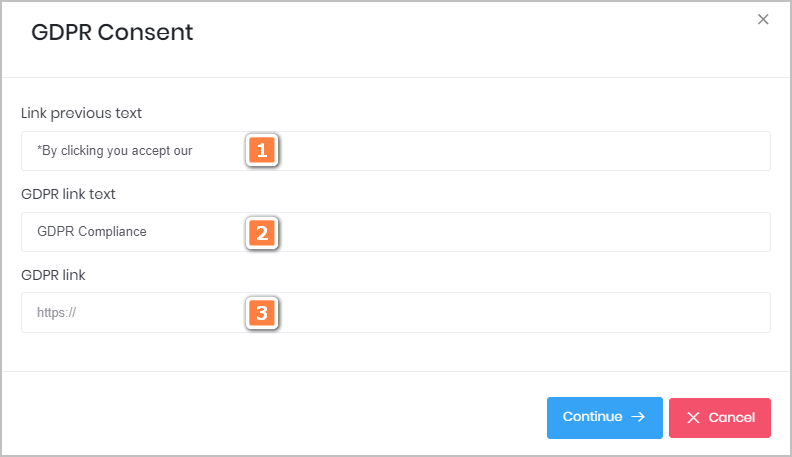
The GDPR Consent panel is similar to the general legal consent panel.
- Part 1 is the first section of your privacy statement.
- Part 2 is the last section of the privacy statement with a specific reference to GDPR compliance.
- Part 3 enter the URL for your GDPR policy document.
Result
Here is what GDPR consent looks like to your website visitors.
